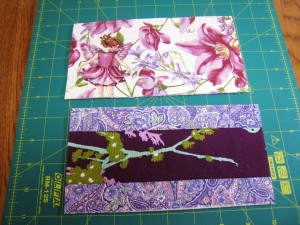
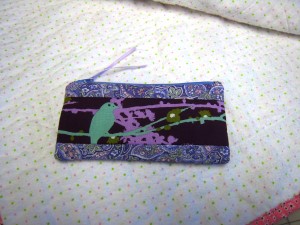
Just a little thank you seems appropriate when someone does something nice for you. Recently my sister-in-law referred me some business. Now I really appreciate that and wanted to thank her. It didn’t seem right to just give her a gift card. She probably would like that but she is a little more down to earth and I think would really appreciate something that I made. I’ve struggled with this for a while now. What color, what kind of fabric, what project. I’ve gone over the list so many times. Along with my “just do it” theme for the year I finally just pulled some fabrics and decided this would be fine. I cut and sewed and made a cute little zippered pouch that I think she will like. I think it turned out very nicely. She is a gardener and she loves purple so this fabric was a good marriage of both. I’m also including a photo of the inside before I put them together because I knew it would hard to snap a picture when it was finished. So here it is. Lovely I think.
Category: handmade (Page 7 of 14)
When I get the urge to sit and sew I often wish that I had things cut out so I could just “sit and sew”. it’s frustrating when you want to just sit at the machine and have to make a decision on what to sew and the fabric choice. Now really it’s about making a decision and some days it’s just too much trouble.
I came across this piece of linen that had a vintage print on it and it had already been lined with fleece. It was also a rectangle. On the spot I decided it was time to make a zip pouch. I have experimented with zipper installations. I want to know what goes the fastest and still looks good. I found some fabric for lining, cut a square of the same size, did a bit of quilting so the two were stuck together and made a zip pouch. It’s cute and I do love the fabric but am not entirely happy with the zipper. It looks ok and works fine but I like them better when they are a little more finished looking. That will be my afternoon project today. For now however, this will go in the pile of things until I need a gift of have a need for a pouch of this size.
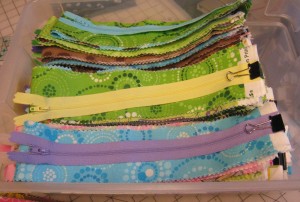
The next project will be a WIP for several months. Can’t say too much about it yet but here are the beginnings. All the roll up strips are matched with the zippers and another set or strips sorted for their project. None of it will be hard to do but the volume may be a challenge. Good think I have a few months!
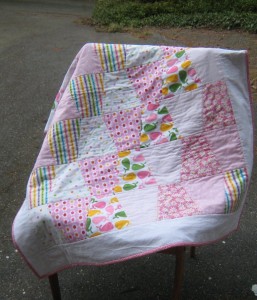
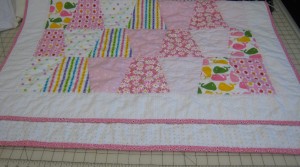
I did it. The pink baby quilt is finished. Like so many other projects when I got to the end I had trouble deciding on the binding. I finally picked a dark pink with little black and white flowers and I’m pleased with my choice. The darker pink frames the quilt nicely. I used a pink and green polka dot flannel on the back so it’s really cozy. I’ve washed it so it’s nice and soft and ready to gift or sell. Now on to the next project.
I love it when the mailman brings something other than bills. Today there were some things that I’ve ordered for upcoming projects. I will not be talking about them for a while because it’s a secret and will not be revealed until July or August! I hope I’ll be able to get them all done in time.
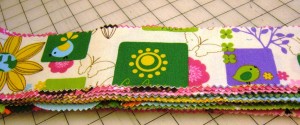
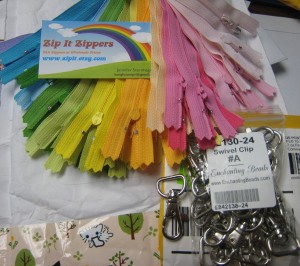
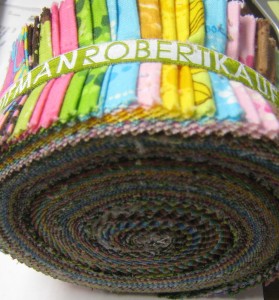
What was in the mail? Sixty 10″ zippers and 24 swivel clips. Oh, I’m anxious to get started! It will take a while but it will be fun. I’ve also purchased 3 yards of interfacing and 3 yards of warm and natural batting. Of course there are some assorted accessories as well like thread. Oh and fabric? Well yes there is fabric as well. I have many jelly rolls of fabric for this project. For those of you that don’t know about jelly rolls, we are talking about a roll of fabric strips that are 2.5 inches wide and include 42 strips of fabric. This provides lots of variety. Fun, fun, fun!
When my kids were little I did love to have a bib handy. When they were little it was drool, when they were bigger it was food and good messes.
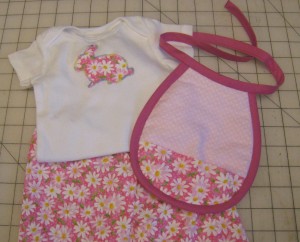
I found a pattern for a little bib that looks like it’s comparable size the new onsie and pants that I just finished. I used a small piece of flannel and a small piece of terry cloth. My original thought was to use an applique on the bib to coordinate with the onsie but I cut the applique too big and it didn’t look right. In the end I just added a little pocket at the bottom, used a package of bias tape that I had and was able to add this cute little bib to the stack. I’m pleased with the result and can see doing this again.
I just received a new die for my Slice Fabrique. After many trials I got this farm set from my daughter. She has been trying to get it for me for about 6 months and it keeps getting lost in transit. Last week I finally got the replacement that had been sent. She actually called tonight and said after 2.5 months the first one she ordered also arrived.
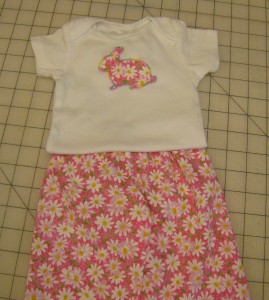
I’ve been waiting to try this out and knew that it was going to be a baby item. I’m trying to build up some stock to open and Etsy shop and I think this will be one of the items in my shop. It was lots of fun to applique the rabbit on the onsie and make up these little pants to go along with it. A perfect spring or summer outfit for a little girl.
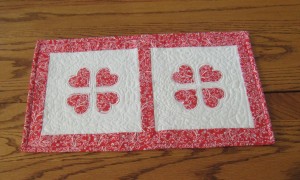
I have a die that will cut hearts. Valentines day is coming and I love red. Seems to me this is a perfect combination to try something new.
I have thought about this project for several weeks but had not made a decision about the direction. I finally decided I just needed to cut some hearts and then go ahead. I didn’t have any more product to make iron on appliques so the first step was make a trip to Joann’s. Now if you shop regularly at Joann’s you should never have to pay full price which is fine with me. That leaves more money to spend somewhere else. When I came home I had two different kinds of iron on applique product. I did some from both the Wonder Under and Heat and Bond Lite and have definitely decided I like the Heat and Bond better. Its easier to use and peels off the back more easily and cleanly. This however was an indication of how the entire project was going to go.
There were continuous challenges with this project. First not all the hearts peeled well. I decided I was just going to applique them onto a white square and satin stitch them. Sort of a make it up as you go kind of project. It’s been a long time since I have done much satin stitch applique so the hearts are not very consistent. After the third one I had already decided this was a project that was likely to end up in the trash. I did continue however because I decided it was already cut and it was good practice. After two squares of applique, several borders and a quilt sandwich I decided that it still didn’t look very good so I might as well practice some quilting. I started and it was really ugly! At this point I was about ready to put it in the trash. I ended up doing all sorts of free motion quilting patterns on the entire piece. There are many inconsistencies in the stitch length and smoothness but by the end it actually improved the looks of the entire piece. I think that the red fabric is so busy that by quilting the white it helped tie it all together. An instance of more really was better.
I put a binding on and it is on my dining room table. It I just go by and glance it actually looks ok. I sure wouldn’t want anyone to look closely at it and I certainly wouldn’t gift it to anyone but for a home product that I thought I was going to trash, it turned out very valentinish.
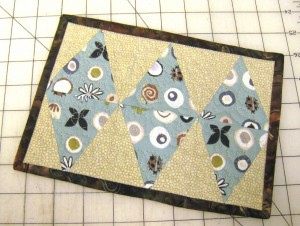
One of my goals this year is learning a new skill. I would like to be able to do a good job at free motion quilting. If you don’t know about free motion quilting it is sewing quilting lines with the feed dog dropped on the sewing machine and the sewer is responsible for guiding the quilt through the machine. The process sort of ends up like the kids game where you try to rub your stomach and pat your head at the same time. With free motion quilting however you have to control the speed of the needle with your foot and the direction and movement of the quilt with your hands. You need to coordinate the feet and the hands to get a smooth even stitch. This of course is much easier to talk about than actually doing. The needle has to be going faster than you think it should and your hands have to be moving more slowly and smoothly than you think they should. One way I have decided to practice this skill is practice every time I make something I’ve cut extra squares and strips. I’ve also made some practice squares to make sure the seams are correct when I’ve started a new project. Even though these squares have not all been accurate I decided instead of setting them aside or putting them in a pile or throwing them away, I can join them together. I can use a piece of leftover batting and some backing from “what was I thinking when I bought this” fabric and I have a piece to practice on. The results can be used for coasters, mug rugs, pot holders or ? It gives me practice and for pot holders etc, the function is more important the looks so it’s a win-win on all accounts.
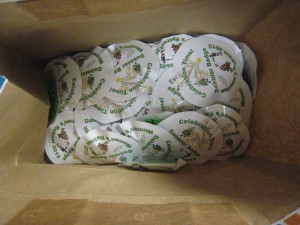
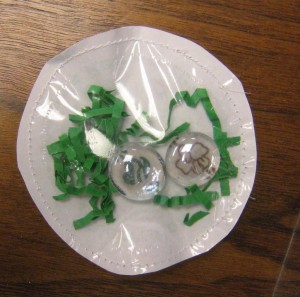
When I was growing up in the Girl Scout organization one of the badges that you could earn was a Dabbler Badge. To complete this badge you had to complete activities from several areas. As part of our 100 year birthday celebration retreat activities we decided to create our own Dabbler Badge. The change of place did mean some modification in what we did but everyone had a great time in spite of the changes. For our badge we rotated between, semaphore flags, folk dancing, fire building and knots. The semaphore activity and fires and knots were all done sitting at tables so this was a modified activity. Fires were edible fires and there was no burning of buildings involved. At the end of activity each participant was awarded a Dabbler Badge. I made these from a patch I created and printed on the printer. Next I inserted the paper into a plastic page protector sleeve. I then sewed around each patch about 3/4 of the way. After I cut the circles out I inserted the magnets into the back of the sleeve behind the badge and then stitched them up on my sewing machine. It was a fun activity that was not hard but did take some time. Like with the magnet making activity the first six were quick but when I got to 48 I was glad to be done.
