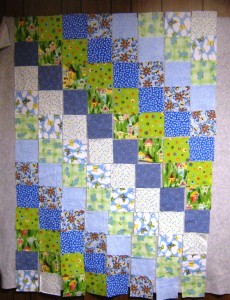
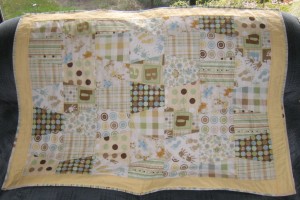
It’s nice to be at a point where I am starting on new projects. It’s always fun and exciting to plan a new project, think about the fabric, the details and who will be receiving the end product. Sometimes I make something just to make it but I do find that I’m more productive and apt to stick with it and finish it if there is a time line or a reason. I’m not good at just sitting and playing. I need a purpose. I recently got a die for my AccuQuilt Go cutter. This cuts simple 5″ squares. I love to cut the fabric with this die. It’s fast and easy and accurate. The package insert always has a pattern idea. When I saw the pattern I knew I had the perfect fabric. Last year when I first started to sew and quilt again one of the first fabrics that I fell in love with was the green fabric with the Swiss houses on it. The pattern was big enough that I knew I needed a bigger block and I really didn’t have too much of the yardage. I had enough other fabrics in my stash to make the rest of the blocks and I spent an hour or so happily cutting and placing this on my design wall. It has been sitting in a box waiting for the day to sew it up and now the day is here. I’m going to make this for a young friend who is having a baby girl and doesn’t like pink. This quilt has flowers and butterflies and these darling little houses and I think it will be perfect. Now I’m off to sew and already planning another new project in my head.
Category: Quilting (Page 3 of 3)
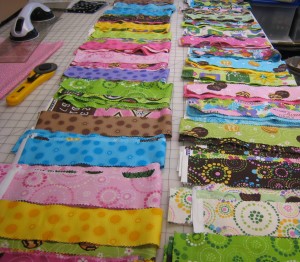
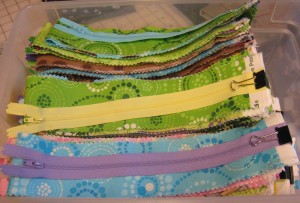
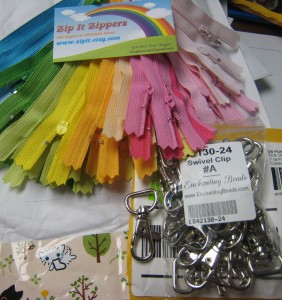
The next step in my adventure was to match up the strips and the zippers. I knew that I wanted each of the zip pouches to be unique. I wanted the strips in pairs of patterns and also didn’t want to be too random and stuck at the end with odd color combinations of strips and zippers. I took the roll ups apart, matched two of the plain prints with a patterned print and then added a coordinating zipper. I laid them out on the cutting table about 20 at a time and them clipped them together with a binder clip and put them in a basket. My friend and co-director volunteered to sew the strips together and press the seams open. That was a life saver for sure! With a few strips isn’t not so bad but when you are talking in the neighborhood of 70 or so.. this accounts for some extras and several “test” pouches.
When I got the strips back from Linda, I cut the strips in half and restacked them with a layer of batting. At this point I could baste them and head for the sewing machine. Now it’s on to the next step.
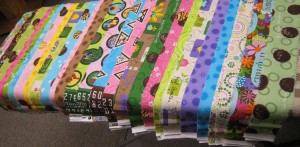
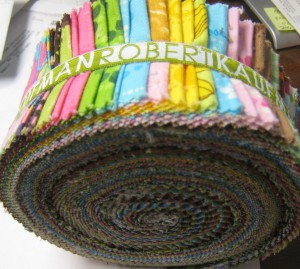
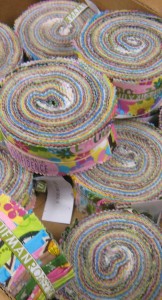
Camp and a Girl Scout 100th birthday celebration. What do they have in common? Well of course, this is a Girl Scout camp so we have to celebrate the birthday. As a co-director my thoughts deal with staffing as much as girl activities. The adults spend many hours planning and preparing for camp and then volunteer to spend a week of their summer as camp counselors so 160 girls can spend a week out doors cooking, canoeing, swimming doing crafts, archery and nature activities. Of course there is singing and learing to work in a team environment as well. We are an all volunteer run camp so money that is collected from the camp fee is used for the camp rental, food and camp program. At the end of the week we like to celebrate with an all camp campfire and thank the adults who helped with a small token of our appreciation. It’s always a challenge to think of something that might be fun, meaningful, useful and not just a trinket. Last year I realized that the Robert Kaufman company had produced a wonderful line of Girl Scout fabric. I knew it would be fun to make something for the staff and for the high school girls who worked as program aids. The dilemma was as we are a non-profit organization and volunteer run camp we did not have much money for thank you gifts and buying fabric to make gifts for 80 people was in our budget. I also was concerned about sewing 80 items in enough time for camp. My original thought was pillow cases. I knew from experience that I could make pillow cases in an assembly line fashion and with several months lead time I could probably make 80. The Robert Kaufman company agreed to donate Girl Scout roll ups. If you are not a quilter you may not have figured out that pillow cases were not happening with roll ups. Roll ups consist of 40 2 .5″ strips of fabric. I was thrilled with the donation but knew I would have to come up with a different plan.
The thinking cap went on and now I was to plan #2. After a bit of experimentation and discussion with my co-director we decided that zip pouches for the adults and lanyards for the girls would be perfect for the fabric available. The adults would love the Girl Scout fabric in the zip pouches and the girls would find the lanyards useful for their schedules and their whistles.
The next project was to order supplies and make a few trial versions.
All was ready for step number two.
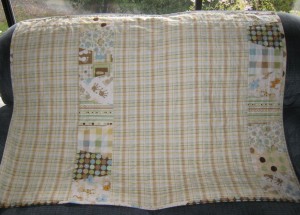
Another baby quilt is finished. I’ve used tumbler blocks again I’m pleased with this one. The colors are not in my normal range of color choice but I do like the way it turned out. I don’t know if the baby will be a boy or a girl. I used ten different fabrics in this quilt and it made a better mix than the previous two. The pink one had seven fabrics and the red and blue one had five fabrics. I like both of the others but this one has a better balance and will be soothing for a baby. The back was an interesting dilemma as well. I had a remnant of one of the front fabrics but I knew it was short. I ended up adding two rows of blocks from the front. They fit in well. One thing that I had not thought about when I made the choice for the back was what the plaid would look like and if I could get it on straight. I ended up washing the fabric before I started because the fabric was stretched. It did straighten out well and I was able to get it straight enough that it looks good. The binding is pieced some of the quilt fabrics and was another good choice. Hope the mom likes it. In any case, it will be a good floor quilt and wash and wear well.
When I get the urge to sit and sew I often wish that I had things cut out so I could just “sit and sew”. it’s frustrating when you want to just sit at the machine and have to make a decision on what to sew and the fabric choice. Now really it’s about making a decision and some days it’s just too much trouble.
I came across this piece of linen that had a vintage print on it and it had already been lined with fleece. It was also a rectangle. On the spot I decided it was time to make a zip pouch. I have experimented with zipper installations. I want to know what goes the fastest and still looks good. I found some fabric for lining, cut a square of the same size, did a bit of quilting so the two were stuck together and made a zip pouch. It’s cute and I do love the fabric but am not entirely happy with the zipper. It looks ok and works fine but I like them better when they are a little more finished looking. That will be my afternoon project today. For now however, this will go in the pile of things until I need a gift of have a need for a pouch of this size.
It’s always exciting to find a new sewing tool. One of my recent discoveries is a new marking pen. When I’m sewing projects there are always things to mark. Sometimes it’s a cutting line. Sometimes it’s a place to join another piece of fabric. There are times that it’s necessary to mark the front or the back. There are various ways to mark any of these things. Sometimes it’s appropriate to make a notch in the fabric. There are times I’ve used tailor tacks. You can use marking chalk’s or marking pens. There are several different types of marking pens including water-soluble or air soluble. I’ve also used marking wheels and tracing paper. Another method of marking is actually stitching him a line without any thread. This can be handy as a guide to turn a hem. You can also use an iron to make a press mark or simply finger press a fold.
The current new sewing tool that I’m using for marking are pens made by Pilot. These Frixion Gel Pens are like magic. You can mark with them on fabric and then simply press with a hot iron and the marks go away. They are so fast and easy to use and the different colors make them easy to use on fabric. It’s too bad my children are all grown up. I’m sure they would’ve loved to use these pens to write secret messages. I can imagine all the fun, they would’ve had when playing with their friends. Hmm… maybe this should be a little something extra they get for a birthday or Christmas
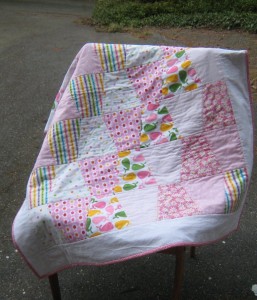
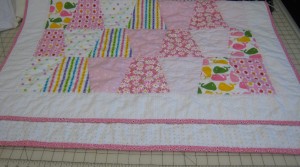
I did it. The pink baby quilt is finished. Like so many other projects when I got to the end I had trouble deciding on the binding. I finally picked a dark pink with little black and white flowers and I’m pleased with my choice. The darker pink frames the quilt nicely. I used a pink and green polka dot flannel on the back so it’s really cozy. I’ve washed it so it’s nice and soft and ready to gift or sell. Now on to the next project.
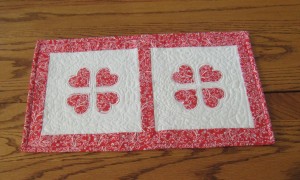
I have a die that will cut hearts. Valentines day is coming and I love red. Seems to me this is a perfect combination to try something new.
I have thought about this project for several weeks but had not made a decision about the direction. I finally decided I just needed to cut some hearts and then go ahead. I didn’t have any more product to make iron on appliques so the first step was make a trip to Joann’s. Now if you shop regularly at Joann’s you should never have to pay full price which is fine with me. That leaves more money to spend somewhere else. When I came home I had two different kinds of iron on applique product. I did some from both the Wonder Under and Heat and Bond Lite and have definitely decided I like the Heat and Bond better. Its easier to use and peels off the back more easily and cleanly. This however was an indication of how the entire project was going to go.
There were continuous challenges with this project. First not all the hearts peeled well. I decided I was just going to applique them onto a white square and satin stitch them. Sort of a make it up as you go kind of project. It’s been a long time since I have done much satin stitch applique so the hearts are not very consistent. After the third one I had already decided this was a project that was likely to end up in the trash. I did continue however because I decided it was already cut and it was good practice. After two squares of applique, several borders and a quilt sandwich I decided that it still didn’t look very good so I might as well practice some quilting. I started and it was really ugly! At this point I was about ready to put it in the trash. I ended up doing all sorts of free motion quilting patterns on the entire piece. There are many inconsistencies in the stitch length and smoothness but by the end it actually improved the looks of the entire piece. I think that the red fabric is so busy that by quilting the white it helped tie it all together. An instance of more really was better.
I put a binding on and it is on my dining room table. It I just go by and glance it actually looks ok. I sure wouldn’t want anyone to look closely at it and I certainly wouldn’t gift it to anyone but for a home product that I thought I was going to trash, it turned out very valentinish.
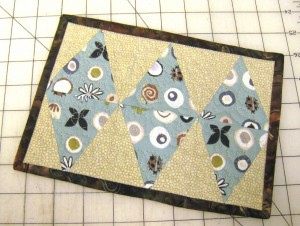
One of my goals this year is learning a new skill. I would like to be able to do a good job at free motion quilting. If you don’t know about free motion quilting it is sewing quilting lines with the feed dog dropped on the sewing machine and the sewer is responsible for guiding the quilt through the machine. The process sort of ends up like the kids game where you try to rub your stomach and pat your head at the same time. With free motion quilting however you have to control the speed of the needle with your foot and the direction and movement of the quilt with your hands. You need to coordinate the feet and the hands to get a smooth even stitch. This of course is much easier to talk about than actually doing. The needle has to be going faster than you think it should and your hands have to be moving more slowly and smoothly than you think they should. One way I have decided to practice this skill is practice every time I make something I’ve cut extra squares and strips. I’ve also made some practice squares to make sure the seams are correct when I’ve started a new project. Even though these squares have not all been accurate I decided instead of setting them aside or putting them in a pile or throwing them away, I can join them together. I can use a piece of leftover batting and some backing from “what was I thinking when I bought this” fabric and I have a piece to practice on. The results can be used for coasters, mug rugs, pot holders or ? It gives me practice and for pot holders etc, the function is more important the looks so it’s a win-win on all accounts.
